![MuckStopper IC 450 Inspection Chamber Protection](/sites/default/files/styles/drainfast_regular_sml_1x/public/2023-11/muckstopper-user-guides2.jpg?h=d1cb525d&itok=J4LfU_r2)
Installation and User Guide
Please download and read the full user guide prior to use.
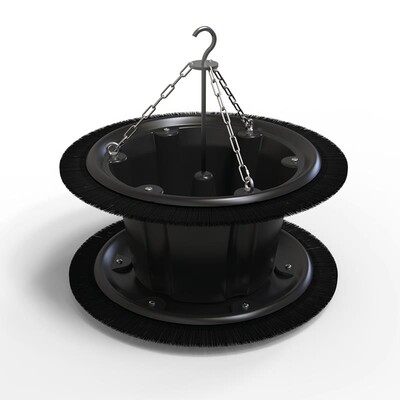
![MuckStopper IC 450 Install Step 1](/sites/default/files/styles/drainfast_regular_sml_1x/public/2023-09/muckstop-450-4k_step-1.jpg?h=8f74817f&itok=qHFm-K3o)
Step One
Install the MuckStopper IC 450 once you have the first riser installed and leave it in place for the duration of the project. (If the risers have already been installed then retrofit the MuckStopper IC 450 by pushing it down into place prior to the cover and frame being fitted)
![MuckStopper IC 450 Install Step Two](/sites/default/files/styles/drainfast_regular_sml_1x/public/2023-09/muckstop-450-4k_step-3.jpg?h=8f74817f&itok=ZN-Yb_nX)
Step Two
Complete the inspection chamber installation as usual adding the rest of the risers. Still fit the cover and frame to prevent dirt entering where possible, The MuckStopper IC 450 then acts as a last line of defence to catch any dirt that does enter.
![MuckStopper IC 450 Install Step Three](/sites/default/files/styles/drainfast_regular_sml_1x/public/2023-09/muckstop-450-4k_step-4.jpg?h=8f74817f&itok=AT-ygGFw)
Step Three
At the end of the project remove the cover & frame and the MuckStopper IC 450 with any debris it has collected, leaving the drains free of blockages.
![MuckStopper IC 450 Install Step Four](/sites/default/files/styles/drainfast_regular_sml_1x/public/2023-09/muckstop-450-4k_step-5.jpg?h=8f74817f&itok=UF-webWs)
Step Four
With the MuckStopper IC 450 removed, the final landscaping can be completed.
Explore the products
![MuckStopper 450mm Debris Collection Unit](/sites/default/files/styles/drainfast_square_med_1x/public/iq_media/remote_product_image/21479197732203-0.jpg?itok=EA40hOuJ)