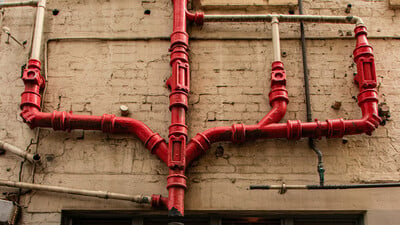
In most modern buildings waste pipes are connected to a soil stack, also known as a soil vent pipe. This vertical pipe, often installed externally to the building, effectively channels sewage and wastewater from a property into the main sewer. It handles waste from toilets, bidets, urinals, household appliances such as washing machines and dishwashers, and wastewater (greywater) from kitchen sinks, baths, hand basins, and showers.
Properly installing waste pipe connections to a soil stack ensures effective drainage and compliance with building regulations. For those without experience, hiring a professional plumber is advised to avoid potential drainage issues such as blockages or leaks. If you are confident that you have the required skills and want to carry out the work yourself, this guide will help you.
Soil Stack Function & Design
The vertical orientation of a soil stack allows solid waste to flow downward efficiently, directing it either to a main sewage system or a sewage treatment plant, particularly in rural areas. Soil stacks are equipped with air admittance valves or vents that allow gases to escape upwards, safely releasing them above the property. To comply with building regulations, these vents must be positioned at least 900mm higher than any window, ensuring that harmful gases and odours are safely dispersed.
Proper installation of a soil stack is crucial for its function. This article provides an overview of various fittings for attaching waste pipes to soil stacks, along with installation guidance.
Types of Waste Pipes
Before connecting any pipes, it's essential to identify the type of pipes you are working with, as different sizes serve various purposes. Most soil pipes are made from uPVC, although older systems might use cast iron pipes.
Pipe diameters determine their suitability for different uses:
- 21.5mm pipe is typically used for toilet cisterns
- 32mm pipe is suitable for small hand basins with a low wastewater output
- 40mm pipe is ideal for showers, baths and kitchen sinks
- 110mm pipe is commonly used for soil pipes from toilets as it is capable of handling solid waste
- Larger-diameter pipes such as 160mm are available if needed.
Types of Pipe Connections
Three types of pipe connections are commonly used to join waste pipes. It is generally recommended to use one method consistently throughout a drainage system so before purchasing new fittings, we advise that you check the existing connections.
Solvent Weld Joints
These permanently join pipes using solvent-weld cement.
Push-Fit Fittings
These create a watertight connection by simply pushing the pipes together, with a rubber seal filling the gaps in the pipe connections.
Compression Fittings
These use an inner compression ring and outer compression nut to create a secure seal. Though more expensive, they have the advantage of being demountable and reusable.
Installing a Soil Stack Connection
Connecting waste pipes to a soil stack involves two main stages: running the waste pipe through the wall where the soil stack is located and then joining the waste pipe to the soil stack.
Follow these steps to achieve a professional connection.
- Establish the pipe exit point
Estimate where the waste pipe will exit the building wall, ensuring there are no obstructions on either side. Allow for a margin of error in your estimation.
- Drill a hole through the wall
Mark the exit point and drill a hole in the wall. A professional drill with a diamond tip is recommended, but smaller drills can be used to create a circumference, followed by enlarging the hole with a cold chisel and hammer. For a neater external finish, consider removing and replacing a brick.
- Prepare the waste pipe
Cut the waste pipe to the correct length and include any necessary bends or fittings. Install an access plug with a removable cover to allow for system cleaning in case of blockages.
- Connect it to the soil stack
Run the waste pipe along the wall and use a boss adapter to join it to one of the soil stack's boss connections. If the soil stack lacks bosses, connect using a strap-on boss or a short boss pipe. For a strap-on boss, cut a hole in the soil stack, align the boss and secure it. For a short boss pipe, install it along the soil pipe run, connect the pipes and secure the joints with solvent cement if not using a push-fit system.
For homes with cast iron soil stacks, ensure boss fittings are suitable or replace a section with a flexible connector.
We hope you have found this information helpful and interesting. As always, we recommend seeking professional advice before embarking on any projects that you are unfamiliar with, and if you have any further questions you are always welcome to call our friendly team of experts on 01420 555600 or email [email protected].
Also, look out for more articles in our ongoing series of blog posts, bringing you useful information, insights, guides and tips on all things drainage!

Written by
Bob Stone
Technical Sales
Heading up our Technical Estimating Department, Bob is our in-house quantity surveyor.

